Light Painting....painting with light and explore your creative side!!
Ready, Set, GO.....Watch this YouTube video of a Sprint light painting commercial
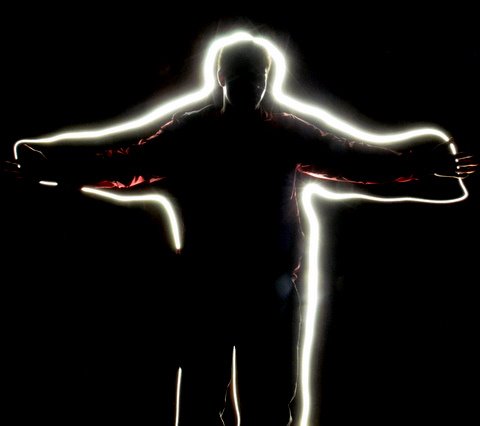
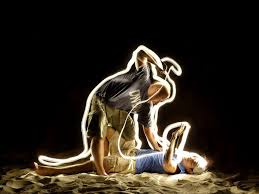
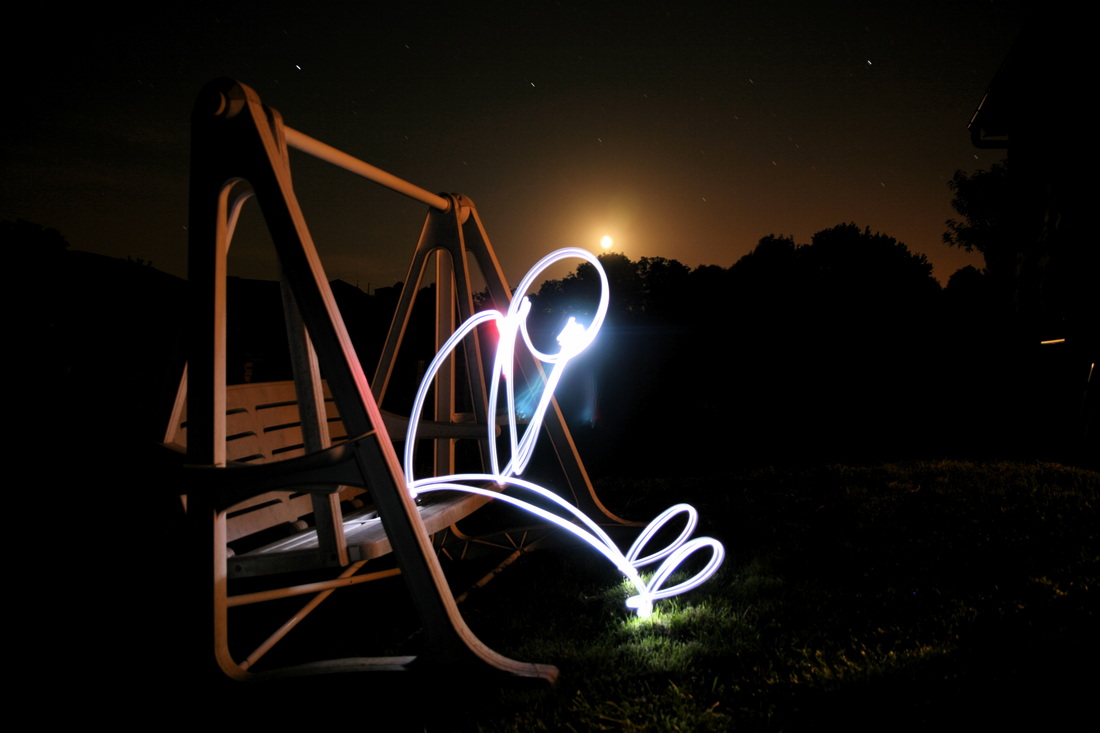
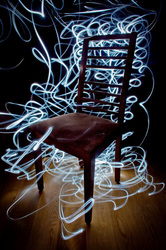
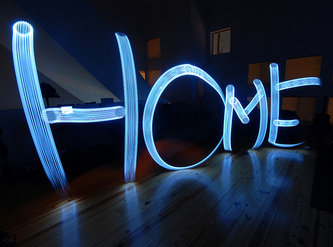
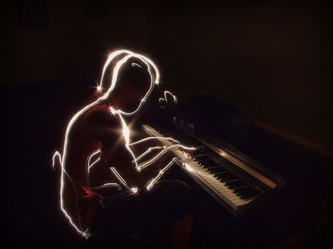
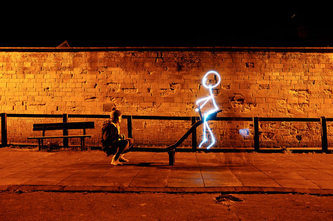
Student Examples...
Painting with light is a fun technique that gives great results. It is called painting with light because this is what you are actually doing while taking the shot - painting with light. You don't need much to experiment with this kind of shot, just make sure you have the following items:
1. A camera capable of long exposures. If you can control your shutter speed manually (TV or S mode); use it. Try anywhere from 2"-8" to start, depending on the darkness of the room. If you cannot control your shutter speed manually, try using the "fireworks", "night scene", "sunset", or "indoor party" mode to force your camera to shoot with a longer exposure. TURN YOUR FLASH OFF - DISABLE YOUR FLASH!!!!!!!!!!!!!!!!!!!!!!!!!!!!!!!
2. A nice tripod. Since you will be doing some long exposures you want to make sure your camera sits still. If you don't have a tripod you can make one in a few minutes (see this article or this one). OR SIMPLY STEADY YOUR CAMERA ON A TABLE, CHAIR, OR DESK!!!!!!!!!!! Do not hand-hold your camera!
3. A flash light - or other fun, light-emitting device: cell phone, LED lights, Christmas lights, light sabers, etc...
4. A dark location. - This one is tricky. If you are going to shoot at home or in school - a dark room will be OK. If you are going to shoot outside - make sure that you are not doing this under a street light, or where a car can come by and "paint its headlight" all over your shot.
Here is how it's done:
Set your camera on the tripod and take a sample shot with flash / lights on. This will help you verify that your composition is OK.
Set the shutter speed to a relatively long value. If you are outside do nothing. If you are inside - this is the time to turn off the lights.
Make the click. Once the shutter is open use your flashlight to light the stuff that you want to "paint". You can use the flashlight as a brash, and "smear" the light, just like you would have done with brush and paper. Or, you can use the light as a pen, and do precise work. Areas where you go slowly will be more lit then others. Be careful not to linger to much over the same stop - you will burn it/overexpose it.
Once the shutter closes, you are a free person again. Inspect your image and make corrections.
Here are some great ideas to use this technique with:


Grading:
Minimum of 12 quality photographs @ 1 pt. per photo uploaded to a new Weebly page = 12 points
Top 3 photos uploaded to the same page in a slideshow or gallery format at the top of your page = 15 points
Proper set-up of photo assignment= 3 points
Weebly written reflection= 5 points
Question #1: Choose your top 3 photos. What did you do to make, or why do you feel they are so interesting? Describe each in detail
Question #2: Explain 3 things you learned from this assignment OR explain 3 things you wish you would have done differently OR could have improved.
Student-created grading scale: How to score a 5 on your written reflections
5 pts. = Concise and well-thought out, no grammatical errors, detailed references to specific photos, references composition, references objectives of the assignment
4 pts. = Provides supporting details of approach to assignment, Lacks detail while referencing specific photos, references composition, references objectives of the assignment
3 pts. = Provides supporting details of approach to assignment, missing a reference to composition or objectives
2 pts. = Does not reference composition or objectives, no supporting details but provides more elaborate statements
1 pt. = No specific information provided, general statements, no direct relation to specific photos
0 pts.= No written reflection
Total assignment worth= 35 points
**A maximum of 6 photos can come from the in-class experimentation session; remaining 6 must be done outside of school...Yes, HOMEWORK on the weekend!
Quick Review of how to set-up your page:
- Top 3 photos in a slideshow/gallery format
- Written reflection on top 3 photos
- 9 remaining photos uploaded in a slideshow/gallery format
